The Ultimate Christmas Cookie Bake-Along: Playlists, Recipes, and Fun!
It’s that time of the year again! The kitchen becomes a magical place where flour dust dances in the air, the sweet aroma of baking fills the house, and laughter rings out as little hands get busy. But what’s a Christmas cookie baking session without some toe-tapping music to sing along to?
Today, I’m sharing with you some of my favorite Christmas playlists that are perfect for a fun, festive baking session with the kids. Plus, I’ve got utterly delicious and super easy Christmas cookie recipes that’s fail-proof and kid-approved. So, grab your apron, preheat the oven, and let’s make some musical baking memories!
Table of Contents
Kid-Friendly Christmas Playlists
1. Spotify’s “Christmas Hits”: A Family Kitchen Dance-Off Awaits!
When it comes to setting the mood for our baking adventure, Spotify’s “Christmas Hits” playlist is like the star atop the Christmas tree – absolutely essential! This playlist is a merry mix of classics and modern favorites. Imagine dusting flour to the rhythm of “Jingle Bell Rock” or decorating cookies as Mariah Carey hits those high notes in “All I Want for Christmas Is You.” It’s perfect for a spontaneous family kitchen dance-off and guarantees smiles all around.
2. YouTube’s “KIDZ BOP Kids – Christmas Dance Along”
If you have little ones who love to sing and move, this playlist is a must. These upbeat, kid-friendly versions of Christmas songs will have your tiny bakers hopping and singing as they help with sprinkles and icing.
3. Amazon Music’s “Christmas for Kids”
This playlist is packed with cheerful, upbeat holiday tunes that keep the energy high and the fun going strong. It’s perfect for keeping little bakers entertained and motivated as they roll, cut, and decorate cookies. Whether you’re adding sprinkles or mixing icing, these festive songs will keep the holiday spirit alive in your kitchen.
4. Apple Music “Children’s Christmas”
This playlist is a mix of timeless Christmas carols and playful kid-friendly songs. It’s ideal for families with varied tastes—there’s something for everyone to enjoy while rolling out dough or sneaking a bite of cookie batter.
Make the music part of the fun! Let each family member choose a favorite song to add to the playlist. Take a break between cookie batches for a family dance-off or a sing-along. This small effort turns an ordinary baking session into a cherished family holiday baking tradition. Plus, the laughter and bonding are just as sweet as the cookies themselves.

Easy and Classic Christmas Cookie Recipes for Families
Baking cookies with kids is not just about the delicious outcome; it’s an adventure filled with laughter, learning, and a few flour clouds. So, let’s roll up our sleeves and get into our fail-proof Christmas cookie recipe that’s as fun to make as it is to eat!
Simple Christmas Shortbread Cookie Recipe
These buttery, melt-in-your-mouth cookies are perfect for little bakers. With just three main ingredients, they’re an excellent choice for easy Christmas cookie recipes with few ingredients. Plus, they’re the ideal canvas for colorful decorations.
Ingredients
- 2 cups of butter (softened)
- 1 cup of powdered sugar
- 3 cups of all-purpose flour
Equipment
- Mixing bowl
- Electric mixer (hand or stand)
- Rolling pin
- Cookie cutters in fun shapes (holiday-themed shapes are perfect)
- Baking sheets
- Parchment paper (if you have it)
- Cooling rack
Step-by-Step Instructions
- Get Ready:
- Wash your hands and make sure your kitchen counter is clean.
- Turn on some cheerful Christmas music and invite the family to join. You can sing along while you work!
- Measure Ingredients:
- Carefully measure out your butter, powdered sugar, and flour. It’s a good idea to have an adult handle this part if you’re baking with very young children, but let them help count cups and spoon ingredients in.
- Mix Butter and Sugar:
- Place the butter and powdered sugar into a large mixing bowl.
- Start the mixer on a low speed at first so the powdered sugar doesn’t fly everywhere, then increase to medium-high.
- Beat these together until the mix looks light, creamy, and fluffy—like a smooth, soft paste. This might take about 2-3 minutes.
- Add the Flour:
- With the mixer still running on medium speed, slowly add the flour, a little at a time.
- Once all the flour is in, increase the speed and continue beating for about 5 minutes. It might feel like a long time, but this is what makes your dough “velvety” and super nice to work with.
- Check the Dough:
- After 5 minutes, turn off the mixer and touch the dough. It should feel soft, smooth, and not too sticky. Chill it in the fridge for about 1 hour before rolling out.
- Roll Out the Dough:
- Lightly sprinkle a clean surface and your rolling pin with a bit of flour.
- Place the dough on the surface and roll it out to your desired thickness. Thicker cookies are softer, while thinner cookies are crispier. Let kids help press the rolling pin—just guide their hands to keep it even.
- Cut the Cookies:
- Use your cookie cutters to make fun shapes—Christmas trees, snowmen, stars, or bells.
- Gently place each cut-out cookie onto a baking sheet lined with parchment paper. If your kids are helping, let them pick the shapes and press down on the cutters. It’s okay if some shapes are a bit uneven; that’s part of the fun!
- Preheat and Bake:
- Preheat your oven to 350°F (175°C).
- Bake the cookies for about 7 minutes. Keep an eye on them—shortbread cookies should stay pale. If the edges are just starting to look light gold, it’s time to take them out.
- Cool and Enjoy:
- Let the cookies cool on the baking sheet for a couple of minutes, then move them to a cooling rack to finish cooling.
- While they cool, turn up the Christmas carols and dance around the kitchen. Maybe sip some hot chocolate while you wait!
- Share and Celebrate:
- Once cooled, the cookies are ready to eat. They’re delicious as they are, but you can also decorate them with icing, sprinkles, or colored sugar if you like.
- Enjoy them with friends, family, or neighbors—spread holiday cheer with every bite.

Extra Tips for Family Fun:
- Let everyone have a job. Smaller kids can help scoop flour, older kids can measure and roll dough, and adults can handle the oven.
- Don’t worry if it gets a bit messy—part of the fun is enjoying the baking process together.
- Play your favorite Christmas playlist, sing along, and create happy holiday memories in the kitchen!
Easy and Delicious Christmas Cookies Recipe 🍪
Sugar cookies are the quintessential classic Christmas cookies. Their soft, slightly chewy texture and versatility make them perfect for all your decorating dreams. Plus, they pair beautifully with a simple icing recipe for cookie decorating.
Ingredients
- 2 ¾ cups all-purpose flour
- 1 teaspoon baking soda
- ½ teaspoon baking powder
- 1 cup softened butter
- 1 ½ cups white sugar
- 1 egg
- 1 teaspoon vanilla extract
- ¼ teaspoon salt
Equipment
- Mixing bowl
- Electric mixer (hand or stand)
- Rolling pin
- Cookie cutters in festive shapes
- Baking sheets
- Parchment paper or silicone baking mat
- Cooling rack
Step-by-Step Instructions
- Get Ready:
Before you start, clear your workspace and gather all your ingredients and tools. Put on your favorite Christmas playlist to set the holiday mood, and invite the family to join. Younger kids can help measure ingredients, while older ones might enjoy mixing and shaping the dough. - Measure Dry Ingredients:
In a medium bowl, whisk together the flour, baking soda, and baking powder. This step helps ensure even baking and light, fluffy cookies. - Mix Butter and Sugar:
In a large mixing bowl, cream together the softened butter and sugar until light and fluffy. This takes about 2–3 minutes with an electric mixer on medium speed. Add the egg and vanilla extract, then continue mixing until everything is well combined. - Combine Wet and Dry Mixtures:
Gradually add the dry ingredients to the butter mixture. Stir gently until the dough comes together. If the dough feels sticky, don’t worry—chilling it will make it easier to handle later. - Chill the Dough:
Cover the bowl with plastic wrap or transfer the dough to an airtight container. Chill it in the refrigerator for at least 1 hour (or overnight if you’re prepping ahead). This step is essential for easy rolling and to prevent excessive spreading during baking.
While the dough chills, take a break! Sing along to a Christmas carol, sip some hot cocoa, or read a holiday story together. - Shape the Dough:
Preheat your oven to 375°F (190°C) or 350°F (175°C) if you prefer softer cookies.
For simple drop cookies: Roll rounded teaspoonfuls of chilled dough into balls. Place them on a baking sheet lined with parchment paper or a silicone mat, leaving enough space between each for spreading.
For cut-out cookies: Lightly dust a clean surface with a small amount of flour, icing sugar, or cornstarch to prevent sticking. Roll out the dough to about ¼-inch thickness. Use cookie cutters to create fun shapes like Christmas trees, stars, and snowflakes. Let the kids choose their favorite shapes and help press the cutters into the dough. - Bake:
Transfer the shaped cookies to the prepared baking sheets. Bake in the preheated oven for 7–8 minutes, or until the edges are just starting to turn light gold.
Pro Tip: For softer cookies, bake at 350°F for the same amount of time. - Cool and Decorate:
Let the cookies cool on the baking sheet for about 2 minutes, then transfer them to a cooling rack. Once completely cool, it’s time to decorate! Use your favorite icing, sprinkles, or edible glitter to turn each cookie into a festive masterpiece.
Tip for Kids: Give each family member their own icing color or decorating station for added fun. - Share and Enjoy:
Serve your cookies with a warm mug of cocoa or wrap them up as gifts for friends and neighbors. Whether you enjoy them fresh out of the oven or save them for a special occasion, these cookies are sure to bring holiday cheer to everyone who tries them.
Extra Tips for Family Fun:
- Let kids get creative with shapes and decorations—uneven cookies are part of the charm!
- Play a decorating game where everyone designs a cookie to represent themselves.
- Keep the music playing and turn cleanup into a contest to see who can pick up the most sprinkles.

Decorating Your Christmas Cookies
After all that rolling, cutting, and baking, it’s finally time to transform your cookies into tiny works of art. Choosing the right Christmas cookie icing recipe sets the stage for creative holiday fun. For a flawless finish that holds up beautifully, look for an icing recipe that hardens just enough to keep your decorations in place. If you’re a newcomer to cookie decorating, don’t worry—there’s nothing like a simple icing recipe for cookie decorating to help you get started. Let the kids join in, explore bright colors, and discover their own unique decorating style.
Kid-Friendly Christmas Cookie Frosting That’s Easy to Spread
For families with younger bakers, a softer frosting can be more forgiving, especially if you’re experimenting with kid-safe cookie decorating ideas. This spreadable icing doesn’t harden completely, but it’s wonderfully sweet, smooth, and simple to handle. Turn on holiday tunes, let each family member choose a favorite color of icing, and watch their eyes light up as they craft edible masterpieces.
Ingredients:
- 3 cups powdered sugar
- 1 tablespoon melted salted butter
- 1 tablespoon vanilla or almond extract (try lemon or anise for extra flair)
- Milk (add slowly until you reach the right consistency)
- Optional: Gel food coloring for festive hues
How to Make It:
- Set the Mood:
Clear a workspace, put on your favorite Christmas playlist, and invite everyone to sing along. Younger children can dance or pick out the next song, turning this into a cheerful family moment. - Blend Sugar and Butter:
Stir the powdered sugar and melted butter together, working gently until the mixture resembles soft, powdery snow. - Add Flavor and Mix:
Pour in your chosen extract and let everyone take a turn stirring. Don’t stress if a bit of sugar spills—embrace the fun as part of the holiday experience. - Adjust Consistency:
Add milk one tablespoon at a time, mixing until your icing is smooth and spreadable. If it’s too thick, more milk does the trick. Too thin? A sprinkle of powdered sugar fixes that. - Bring on the Color:
Divide the icing into smaller bowls and add a few drops of gel food coloring. Kids will love watching vibrant swirls appear as they mix. Experiment with classic Christmas shades or go wild with unexpected colors. - Decorate and Delight:
Lay out your cookies and let everyone choose their frosting technique. A butter knife or spoon is all you need for an easy cookie frosting technique for first-time family bakers. Top each cookie with sprinkles, candies, or edible glitter, encouraging every participant to add their personal touch.
Letting Iced Cookies Set:
Once decorated, allow the cookies to rest so the icing can firm up slightly. This pause is a perfect chance to turn cleanup into a game—see who can gather sprinkles fastest, or tell a favorite Christmas story while tidying up.

A Firmer Icing Recipe That Hardens for More Intricate Designs
If you’re ready to take your cookie artistry up a notch, try an icing that sets more firmly. This option lets you stack and gift cookies without smudging delicate patterns. Gather the family and dive into this easy, shiny icing that makes every treat look bakery-worthy.
Ingredients:
- 2 cups powdered sugar
- 2–4 tablespoons milk (start with 2 and adjust as needed)
- 1 tablespoon honey or light corn syrup for extra shine
- 1 teaspoon vanilla extract
- Food coloring (optional)
How to Make It:
- Prep and Playlist:
Spread a protective covering over your table and organize your tools. Cue up a favorite carol or two—maybe “Jingle Bells” as everyone stirs and hums along. - Mix and Marvel:
Combine powdered sugar, milk, honey or corn syrup, and vanilla until smooth. If it’s too thick, add milk a teaspoon at a time. Too thin? A pinch of powdered sugar will help. - Test and Tint:
Lift a spoon—if the icing drips slowly, you’ve nailed the perfect consistency. Divide it into bowls and swirl in food coloring. Kids adore watching these edible “paints” come to life. - Decorate Like Pros:
With a thicker icing that sets nicely, try using a piping bag or squeeze bottle for finer details. Show children how to make simple patterns or encourage older helpers to attempt more intricate designs. Everyone can enjoy playing “cookie artist,” turning plain shapes into tiny treasures.
Family Fun Tips:
- Share old family stories as you create edible memories together.
- Encourage friendly cookie-decorating contests with categories like “Most Creative” or “Best Use of Sprinkles.”
- Capture these moments with photos—years later, you’ll smile at the homemade treats and flour-dusted faces.
More Creative Decorating Ideas
- Simple and Fun Techniques:
Use spoons or butter knives to spread the icing onto cookies. For more precise designs, small decorating brushes or squeeze bottles work wonders. - Sprinkles and Candies Galore:
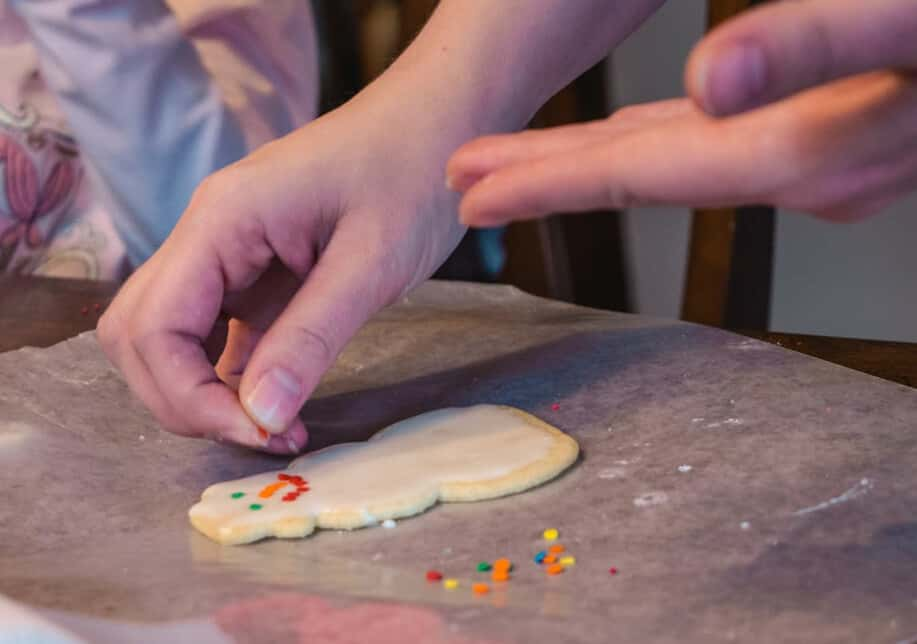
Create a decorating station stocked with sprinkles, edible glitter, mini candies, and chocolate chips. Let kids’ imaginations run wild as they design their edible masterpieces. - Edible Art:
For older kids, consider edible markers. They can draw patterns, add faces to snowmen, or write festive messages. This activity encourages creativity and results in adorable, personalized treats. - Colored Sugars Before Baking:
Sprinkle colored sugar over your cookie dough before baking and gently press it in with a rolling pin. This adds sparkle and texture while keeping the process mess-free for younger bakers.
These small touches not only elevate your holiday cookies visually—they also transform the decorating process into a joyous family tradition that warms your heart and home.
Unique, Vegan, and Gluten-Free Options
Every family is wonderfully unique, and your holiday baking should reflect that. With just a few tweaks, you can create an assortment of festive treats that everyone will enjoy, from loved ones following a plant-based diet to those needing a gluten-free dessert. This is your chance to explore fun and unique Christmas cookie recipes that can spark a new tradition in your home—one that embraces everyone’s tastes, dietary choices, and favorite flavors. After all, the best Christmas cookies recipe ever your family will love often comes from experimenting, sharing laughter, and adding a little something special that makes the moment truly yours.
Vegan Christmas Cookies Recipe
Let’s make delicious gluten-free Christmas cookies that are easy enough for everyone to enjoy. Follow these simple steps, put on some festive music, and have fun making memories together!
Ingredients:
- 2½ cups gluten-free all-purpose flour blend (choose one that already has xanthan gum)
- ½ teaspoon baking powder
- ¼ teaspoon salt
- ½ cup (1 stick) unsalted butter, softened
- ½ cup granulated sugar
- 1 large egg
- 1 teaspoon vanilla extract
Optional for Decorating:
- Homemade icing (see previous icing recipe)
- Sprinkles, edible glitter, or small candy decorations
Step-by-Step Instructions:
- Set the Holiday Mood:
First, clear a spot in your kitchen or dining area. Lay down a clean tablecloth or parchment paper. Put on your favorite Christmas songs. You might even sing along while you work—this makes baking a joyful family experience! - Mix the Dry Ingredients:
- In a medium bowl, whisk together 2½ cups gluten-free flour, ½ teaspoon baking powder, and ¼ teaspoon salt.
- Set this bowl aside for later.
Kid-Friendly Tip: Let kids measure and pour the ingredients. It’s like a fun puzzle to get the exact amount!
- Cream the Butter and Sugar:
- In a large mixing bowl, add ½ cup softened butter and ½ cup sugar.
- Use a hand mixer (or a sturdy spoon) to mix until it looks light and fluffy, like a soft cloud.
Family Fun Tip: Let the kids take turns holding the mixer (with your help) or stirring with a spoon. They’ll feel like real bakers!
- Add the Wet Ingredients:
- Crack 1 egg into a small dish to make sure no shells get in, then add it to the butter-sugar mixture.
- Pour in 1 teaspoon vanilla extract.
- Mix everything until it’s well combined.
Safety Tip: Teach kids how to carefully crack an egg. If a bit of shell slips in, use a spoon to fish it out. Mistakes happen—no worries!
- Combine Wet and Dry:
- Gradually add the flour mixture to the butter-sugar mixture.
- Mix on low speed or stir slowly, a little at a time, until a dough forms.
- If the dough feels too sticky, add a tiny bit more flour. If it’s too dry, add a teaspoon of milk.
Together Time: Chat about your favorite Christmas moments or guess what shapes you’ll cut out while you mix.
- Chill the Dough:
- Wrap the dough in plastic wrap and let it rest in the refrigerator for at least 30 minutes. Chilling makes it easier to roll and cut the cookies.
Waiting Game: While the dough chills, why not sing a favorite Christmas carol or dance around the kitchen?
- Roll and Cut Shapes:
- Preheat your oven to 350°F (175°C).
- Lightly dust a clean surface with a bit of gluten-free flour. Roll out the dough to about ¼-inch thick.
- Use festive cookie cutters—like stars, trees, or gingerbread people—to cut out shapes.
Kid Engagement: Let children pick their favorite shapes and gently press the cutters into the dough. They’ll love seeing their creations come to life!
- Bake the Cookies:
- Place the cut-out cookies on a baking sheet lined with parchment paper, leaving a little space between them.
- Bake for 8–10 minutes or until the edges just start to turn a light golden color.
- Remove from the oven and let them cool on a wire rack.
Safety Reminder: Grown-ups handle the oven part, but kids can watch through the oven window and guess when the cookies will be done.
- Decorate and Have Fun:
- Once the cookies are completely cool, top them with icing and add sprinkles or small candies.
- You can separate the icing into bowls and add food coloring to create fun, bright colors.
Family Bonding: Everyone can have a job: one person spreads icing, another adds decorations, and someone else arranges the cookies on a platter. Switch roles to keep it fair and fun!
Family Tips for a Jolly Time:
- Sing-Along: Keep the Christmas music playing! Older kids can help younger ones sing the words.
- Story Time: While decorating, share stories about past holidays or talk about what everyone’s thankful for.
- Photo Memories: Take pictures of your cookie masterpieces to remember the laughter and love you shared.
Easy Cleanup:
- When you’re done, make cleaning up a game—set a timer and see how fast everyone can help tidy the kitchen.
- Have a quick dance party afterward to celebrate your teamwork!
Enjoy Your Cookies!
Your gluten-free Christmas cookies are ready to brighten your holiday. They’re perfect for sharing with family and friends, wrapping up as gifts, or enjoying with a warm mug of cocoa. Happy baking, and have a joyful, musical holiday season together!
